Modeling a parametric spiral staircase This lesson will look at the example of a parametric spiral staircase. SgCore functions will be used to build the contours, the surface extrusions and rotations, and the spiral bodies.
To start with, lets define the parameters on which our model will depend. The first two parameters are the inner and outer radius of the staircase. The width of the staircase itself will depend upon these. The third parameter is the height of the staircase, from the first step to the last. The fourth parameter is the number of coils in the spiral that the staircase is formed from. And the fifth parameter is the number of steps on one coil of the spiral. By adjusting these parameters, we can get an enormous variety of different models of spiral staircases. The following function will build the model:
|
|
void Build(sgFloat in_rad, sgFloat out_rad, sgFloat stairH, unsigned int helix_cnt, unsigned int steps_cnt)
|
|
The complete construction of the model can be broken into just a few stages, each of which is broken into two sub-stages: the construction of a contour, and an operation with this contour to obtain the necessary 3D object.
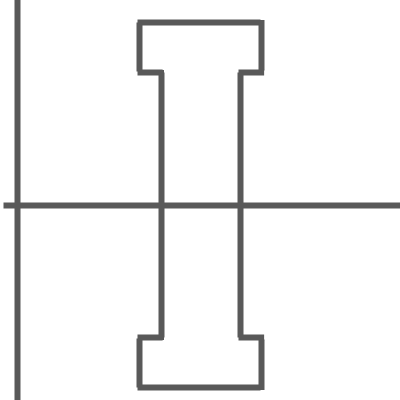
So, our first step will be to construct one step for our staircase. You can see the algorithm for constructing the contour of the step in the following diagram:
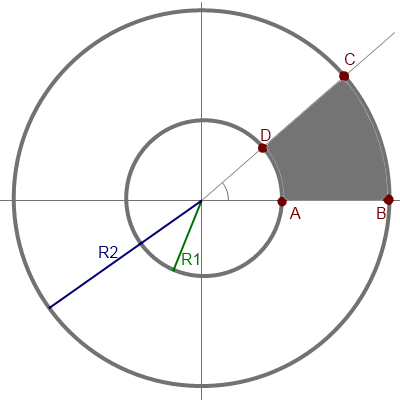
Where R1 is the inner radius of the staircase (one of the parameters of our model) and R2 is the outer radius (also a parameter). Points A, B, C and D form the contour of a single step. The angle that forms points D and C is calculated based on the condition that one coil of the staircase spiral is made up of m_steps_count number of steps, i.e. this angle equals 2*M_PI/m_steps_count.
In this way, we get the following algorithm to construct the contour of our step:
|
|
sgCContour* StaircaseModel::BuildStepContour()
{ sgCObject* objcts[4]; SG_POINT aPnt = {m_in_radius, 0, 0}; SG_POINT bPnt = {m_out_radius, 0, 0}; objcts[0] = sgCreateLine(aPnt.x, aPnt.y, aPnt.z, bPnt.x, bPnt.y, bPnt.z); sgFloat angl = 2*M_PI/m_steps_count; sgFloat sinAng = sin(angl); sgFloat cosAngl = cos(angl); SG_POINT dPnt = {m_in_radius*cosAngl, m_in_radius*sinAng, 0}; SG_POINT cPnt = {m_out_radius*cosAngl, m_out_radius*sinAng, 0}; SG_ARC arc1; arc1.FromCenterBeginEnd(zeroP, bPnt, cPnt, false); objcts[1] = sgCreateArc(arc1); objcts[2] = sgCreateLine(cPnt.x, cPnt.y, cPnt.z, dPnt.x, dPnt.y, dPnt.z); SG_ARC arc2; arc2.FromCenterBeginEnd(zeroP, dPnt, aPnt, false); objcts[3] = sgCreateArc(arc2); return sgCContour::CreateContour(objcts, 4); } |
|
Next, we need to extrude this contour to get the 3D body. For this, we will use the function sgKinematic::Extrude:
|
|
sgC3DObject* StaircaseModel::BuildOneStep(const sgCContour* stepCont)
{ SG_VECTOR extrVect = {0,0, m_stair_height/m_helix_count/m_steps_count/1.0f}; return ((sgC3DObject*)sgKinematic::Extrude(*stepCont, NULL, 0, extrVect, true)); } |
|
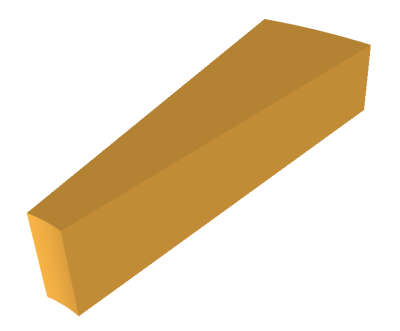
Following this, we have the first step of our staircase:
Next, by using the object clone function and shifting and rotating, we can construct all the steps of our staircase:
|
|
sgCContour* cont = BuildStepContour();
sgC3DObject* firstStep = BuildOneStep(cont); firstStep->Triangulate(SG_VERTEX_TRIANGULATION); firstStep->SetAttribute(SG_OA_COLOR, 20); sgGetScene()->AttachObject(firstStep); for (int i=1;i < steps_cnt*m_helix_count; i++) { sgC3DObject* curStep = (sgC3DObject*)(firstStep->Clone()); SG_VECTOR shiftVec = {0,0, i*m_stair_height/m_helix_count/m_steps_count}; curStep->InitTempMatrix()->Translate(shiftVec); curStep->GetTempMatrix()->Rotate(zeroP, zAxe, i*2*M_PI/steps_cnt); curStep->ApplyTempMatrix(); curStep->DestroyTempMatrix(); curStep->Triangulate(SG_VERTEX_TRIANGULATION); curStep->SetAttribute(SG_OA_COLOR, 20); sgGetScene()->AttachObject(curStep); } |
|
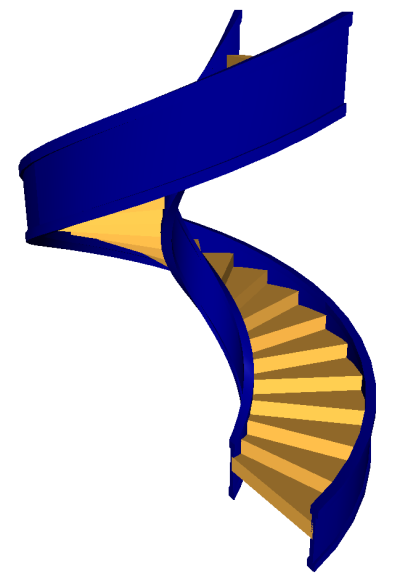
This is what we have:
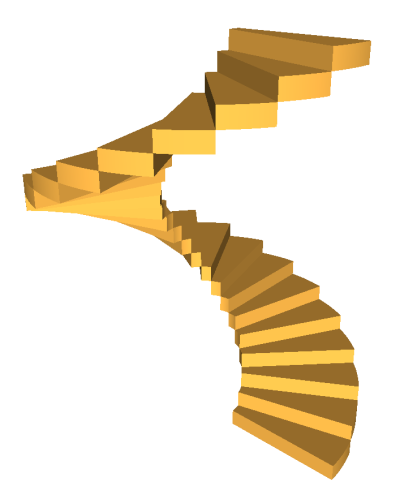
We have not introduced the step height to the model parameters, but this can be changed a little by adjusting the height of the vector of extrusion for the individual step:
The next step will be the construction of the two stringers that the steps themselves will be fastened to. Since our staircase is spiral-shaped, the stringers will, of course, be built as spirals of a particular cross-section. This cross-section will be identical for the inner and outer stringers. The only difference will be in the radii of the spirals built on the basis of this cross-section.
We will use the following as a cross-section for the stringer:
The contour is symmetrical about the horizontal and vertical axes, and is easily formed by simply listing its 12 component sections:
|
|
sgFloat a1 = ((insideGuide)?m_in_radius:m_out_radius) - GUIDE_WIDTH/2;
sgFloat a2 = a1 + GUIDE_WIDTH/4; sgFloat a3 = a1 + 3*GUIDE_WIDTH/4; sgFloat a4 = a1 + GUIDE_WIDTH; sgFloat b1 = -2*m_stair_height/m_helix_count/m_steps_count; sgFloat b2 = 3*b1/4; sgFloat b3 = -b2; sgFloat b4 = -b1; sgCObject* objcts[12]; objcts[0] = sgCreateLine(a2, 0, b3, a2, 0, b2); objcts[1] = sgCreateLine(a2, 0, b2, a1, 0, b2); objcts[2] = sgCreateLine(a1, 0, b2, a1, 0, b1); objcts[3] = sgCreateLine(a1, 0, b1, a4, 0, b1); objcts[4] = sgCreateLine(a4, 0, b1, a4, 0, b2); objcts[5] = sgCreateLine(a4, 0, b2, a3, 0, b2); objcts[6] = sgCreateLine(a3, 0, b2, a3, 0, b3); objcts[7] = sgCreateLine(a3, 0, b3, a4, 0, b3); objcts[8] = sgCreateLine(a4, 0, b3, a4, 0, b4); objcts[9] = sgCreateLine(a4, 0, b4, a1, 0, b4); objcts[10] = sgCreateLine(a1, 0, b4, a1, 0, b3); objcts[11] = sgCreateLine(a1, 0, b3, a2, 0, b3); return sgCContour::CreateContour(objcts, 12); |
|
Next, we need to construct two spiral-shaped bodies, using the sgCore - sgKinematic::Spiral function (remembering to delete the large contours that are not required) and the inner and outer radii of the staircase:
|
|
(sgC3DObject*)sgKinematic::Spiral(*guideCont, NULL, 0, zeroP, zAxe, m_stair_height/m_helix_count, m_stair_height, 36, true);
|
|
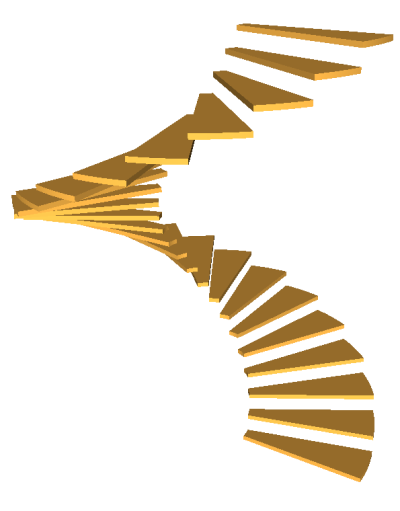
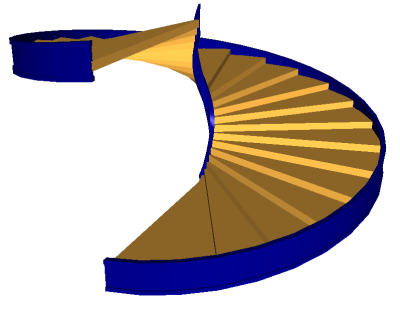
This is what we get:
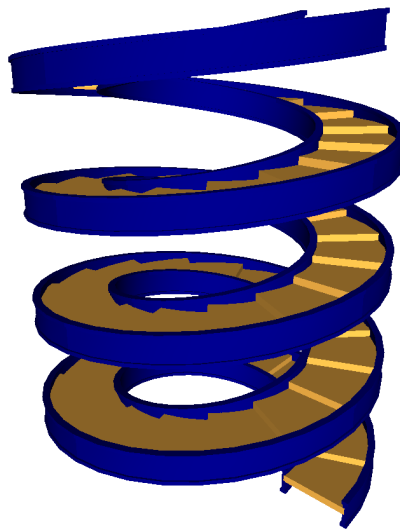
Lets adjust the parameters a little and see what staircases we come up with:
Excellent! Now we just need to add the balusters and handrail.
In real examples, balusters can have a very complex configuration, but they are always, in essence, rotated objects. We will not over-complicate the configuration of this contour, as this will not teach us anything new in this lesson : the result, either way, will be a rotated body. The contour of our baluster will consist of two bars with an arc between them:
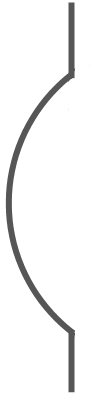
Lets apply a rotation operation to this contour:
|
|
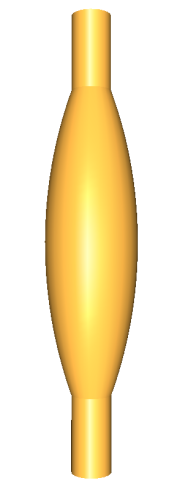
sgC3DObject* StaircaseModel::BuildBaluster(const sgCContour* balusterCont)
{ SG_POINT axeP1 = {m_out_radius, 0, 0}; SG_POINT axeP2 = {m_out_radius, 0, 1}; return (sgC3DObject*)sgKinematic::Rotation(*balusterCont, axeP1, axeP2, 360, false); } |
|
And we get the following result:
By cloning and placing each copy in the relevant position, we get the following:
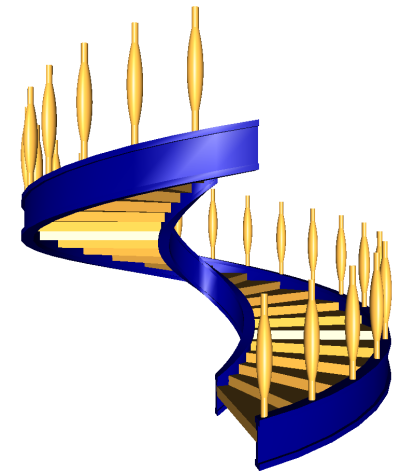
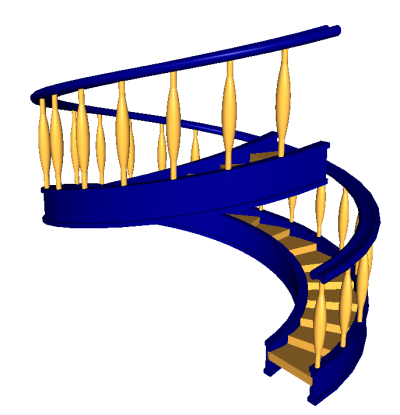
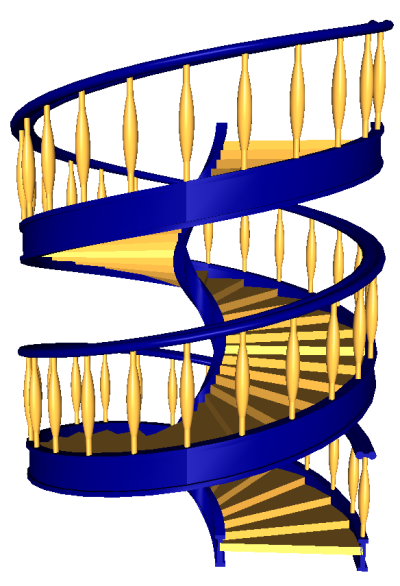
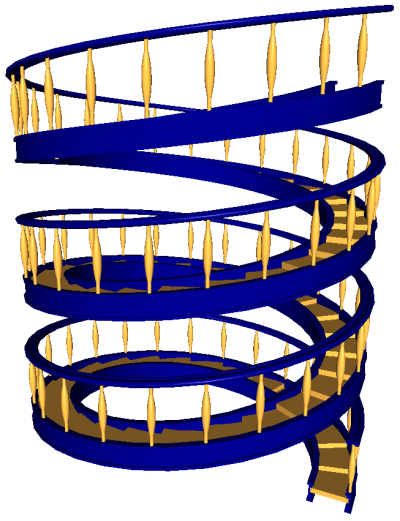
The final step is to add the handrail to the model. The handrail is also a spiral-shaped object, and we will create it in exactly the same way as the stringers. The only difference will be that a different contour will be used, formed of two bars and two arcs.
By changing the parameters, here are the staircases that we can make:
|

| SGCORE | TUTORIALS | ORDER | CUSTOMERS | CONTACT |
